Lucy The Cat

This is my pet cat Lucy. She is a calico tortise shell. Lucy is also 7 years old!
Monday, 20 January 2014
Heart Doily Decoration
Fire_Cat Here!!
And welcome back to Dusty Day Crafts. In this post, I will share with you how to make a Heart Doily Decoration for Valentines day.Why don't we get started!

First, grab a piece of watercolor paper. Lay the doily heart down on it. Then grab a white crayon and draw some hearts around it. I also wrote "Be mine" and "love" on mine. Remember to press hard with the crayon!
 Now remove the heart from the paper and set it aside. Now grab a small spray bottle and fill it about half way with water. Now squirt some red and white watercolor paint (The kind in the tube) into the water.
 Great! now screw on the lid nice and tight and shake it!! Once the water turns pink, it's ready to spray. Spray all around the paper. Your white crayon drawing should start appearing!
 Now let it dry. I let mine dry overnight because there were lots of puddles.
Once it's dry, lay down the doily in the middle again.
 Now. Have you ever heard of paint doters? You know. The big bottle with the round tip? It makes a circle print on paper.

 (This photo turned out way to amazing. But could you call it "Pretty?")
Take your paint doter (If you don't have any use a sponge dipped in paint.) and dot all around the doily. Fill in every little hole and edge. Once everything is covered, peel away the doily and reveal the artwork.

 Boom. Masterpiece.
 And that's how it's done. But before I go, here are two pictures of Lucy to compare. She's been sitting like this with her paw up, and it makes great cat photogaphy.

 See? Exact same pose!! Also, I decorated my bedroom door for valentines day. Check it out!:
 Well, that's all for today. Thanks for reading! Feedback is appreciated. See you all next post!
And welcome back to Dusty Day Crafts. In this post, I will share with you how to make a Heart Doily Decoration for Valentines day.Why don't we get started!
First, grab a piece of watercolor paper. Lay the doily heart down on it. Then grab a white crayon and draw some hearts around it. I also wrote "Be mine" and "love" on mine. Remember to press hard with the crayon!
Once it's dry, lay down the doily in the middle again.
Take your paint doter (If you don't have any use a sponge dipped in paint.) and dot all around the doily. Fill in every little hole and edge. Once everything is covered, peel away the doily and reveal the artwork.
Wednesday, 15 January 2014
Valentine Heart Sun Catcher
Fire_Cat Here!!
And welcome back to Dusty Day Crafts. On this post, I will teach you how to make a cheery Valentine Sun Catcher.

Let's get started!
First, get a piece of laminating film. Draw a heart on the shiny smooth side. (Don't peel the paper off yet!) Also, make sure to leave room so you can fold it over!
 Now, peel back the corner a tiny bit, ( Not all the way!) and put a piece of tape down to hold the paper down. Do this on all four corners.
Once you're done that, peel off the paper. Now you can see the heart.
( It's probably hard to see the paper on the camera, so I put an outline on with a photo editor.)
 (Sorry about the blurs! Also photo editor's fault)
Next, rip off big pieces of tissue papaer and stick it on the heart. It's okay if you go out of the lines you drew.


Now fold over the other half, give it a good press down and cut it out.

Done!! Now hang it an your window and enjoy!

Thanks for reading! Feedback is appreciated.
See you all next post!
And welcome back to Dusty Day Crafts. On this post, I will teach you how to make a cheery Valentine Sun Catcher.
Let's get started!
First, get a piece of laminating film. Draw a heart on the shiny smooth side. (Don't peel the paper off yet!) Also, make sure to leave room so you can fold it over!
Once you're done that, peel off the paper. Now you can see the heart.
Next, rip off big pieces of tissue papaer and stick it on the heart. It's okay if you go out of the lines you drew.
Now fold over the other half, give it a good press down and cut it out.
Done!! Now hang it an your window and enjoy!
Thanks for reading! Feedback is appreciated.
See you all next post!
Thursday, 9 January 2014
Bird Nest Valentine
Fire_Cat Here!!
And happy Valentines day!! Valentines day is only a month away and I've already started crafting!! Here is my latest craft the Bird Nest Valentine:

First of all, here are some things you need:

First fold the brown piece of paper in half.
Draw a nest shape on it, and cut it out. Make sure to cut through both halves. Now you should have two identical nest shapes.

Now get your pink paper and draw a heart like shape and. It it out this will be the bird's body.

Also draw and cut out a long skinny heart for the wing, and a beak shape too. ( I also made the beak shape resemble a heart.


Now get the nest shapes we set aside earlier. Put glue on the side with no brown marker on it like this: (There is white where there should be glue.)
 (Sorry for the low resolution! My photo editor that I used to draw on the white did this.)
Stick the bird on the circle of glue at the top, and then put the other half of nest on.

Now you should have a pocket. Use it to store candy and treats in.

Now get a few sizes of heart hole punches. I used a large one and a tiny one. Punch out one big heart and lots of little hearts out of red and pink paper.
 Glue all of them on the nest like so:
 And why only one big heart?? Use this to write To: and From: on.
 Viola! Finished. Have a lovely Valentines Day!!
See you all next post!!
<3
And happy Valentines day!! Valentines day is only a month away and I've already started crafting!! Here is my latest craft the Bird Nest Valentine:
First of all, here are some things you need:
Draw a nest shape on it, and cut it out. Make sure to cut through both halves. Now you should have two identical nest shapes.
Now glue the pieces together with the glue stick. Also draw on an eye with the black marker.
Stick the bird on the circle of glue at the top, and then put the other half of nest on.
Now get a few sizes of heart hole punches. I used a large one and a tiny one. Punch out one big heart and lots of little hearts out of red and pink paper.
See you all next post!!
<3
Wednesday, 11 December 2013
Permanent Marker Stained Glass & Two Hot Glue tricks
Fire_Cat Here!!
And Happy Holidays! Christmas is almost here and Ive got some holiday crafts to share. Here is a beautiful window art craft that's easy and fun to do!:

First get a piece of parchment paper and draw on a design with pencil.(Don't mind my wavy lines on the inside of the tree in this picture.)

Now, get some 3D dimensional fabric paint and trace over the lines. Also draw some wavy lines inside of the outline. This will give the picture the stained glass effect.

Now here is the boring part. Get ready... Wait for the paint to dry over night.

Tip: If you get impatient like i do, put some extra dots of glue the same size of your lines and do this at the same time you outline the picture. That way you can smear and poke them to see if the paint dry without wrecking the paint lines.
Once the paint is dry, you can start coloring. get your permanent markers!! Pick two or three colors and color the different sections with them. For example, I chose three different colors of yellow to do my star with.

 When you're done coloring, let the marker dry a bit. because the paper is slippery, it will smear and stay wet for about a minuet. Now get out some white glue or Mod Podge. (I used the Mod Podge.) brush some onto some areas you want. (I did the Ornaments, and star.) Now get some glitter and sprinkle it on. Let it dry, shake off the extra glitter and hang it in your window!

 I hope you liked the craft!! Now I'll show you two hot card tricks.
Hot glue trick #1
Holly
 First, make a tiny ball of hot glue. Tip: When releasing the gun's tip from the glue ball, swirl it around. this will even it out.
 (this glue ball is only about the size of a candy button. I just zoomed in!)
Once the glue in completely dry, (You'll be able to tell when the glue fogs up a bit.) put the next ball right beside it. You have to wait till the first one is dry or else the two will fuse together into one big blob of steaming hot glue.)
 Now, let the second ball dry and place the third ball like this:
 Now let ball #3 dry. Once it's dry, get a permanent marker and color them all red. Try to avoid getting it on the paper. Now get a green fine marker and draw on some spiky holly leaves. viola! Done!

Hot glue trick #2
Bumpy Borders
Simply just make lines by pushing the trigger on the glue gun on and off over and over at a fast-ish speed. Color it with permanent markers if you want.
 Here are some examples I did:
 Mistletoe cats
 Ho Ho Holly
 GIANT HOLLY!!!!!!!
I hope you have a wonderful Christmas!!
Signing off!
And Happy Holidays! Christmas is almost here and Ive got some holiday crafts to share. Here is a beautiful window art craft that's easy and fun to do!:

First get a piece of parchment paper and draw on a design with pencil.(Don't mind my wavy lines on the inside of the tree in this picture.)

Now, get some 3D dimensional fabric paint and trace over the lines. Also draw some wavy lines inside of the outline. This will give the picture the stained glass effect.

Now here is the boring part. Get ready... Wait for the paint to dry over night.

Tip: If you get impatient like i do, put some extra dots of glue the same size of your lines and do this at the same time you outline the picture. That way you can smear and poke them to see if the paint dry without wrecking the paint lines.
Once the paint is dry, you can start coloring. get your permanent markers!! Pick two or three colors and color the different sections with them. For example, I chose three different colors of yellow to do my star with.


Hot glue trick #1
Holly


Once the glue in completely dry, (You'll be able to tell when the glue fogs up a bit.) put the next ball right beside it. You have to wait till the first one is dry or else the two will fuse together into one big blob of steaming hot glue.)


Bumpy Borders
Simply just make lines by pushing the trigger on the glue gun on and off over and over at a fast-ish speed. Color it with permanent markers if you want.


I hope you have a wonderful Christmas!!
Signing off!
Saturday, 11 May 2013
2 Fun Mother's Day Gifts To Make
Fire_Cat Here!!!!!
Today I have 2 Mother's Day crafts to make! They are...
The Dandelion Vase...

And the Mother's Day Blossom!

First we'll start out with the Painted vase.
Painted Dandelion Vase
First of all, I got this vase at the Dollar Store.

Start with a light, light, almost white glass paint and paint a thick white stripe at the top.

Paint the rest of the vase with a sky blue glass paint. Also make sure to blend the sky blue with the whitey blue. (Leave about an inch long gap with no paint for the grass)

Now add the grass. Just paint lots of lines of green paint.

Now for the dandelions. Paint one tiny dot then add lots of lines going out and around it. (Make sure the blue paint is dry enough to touch before doing this part.)

Add some darker yellow to it. Now add a line for the stem, and a leaf.
 Keep repeating this so that the grass has lots of dandelions. Paint the dainelions at different heights.

Let it dry and follow the baking instructions...
Ta Da!! You're finished! Tie a ribbon around it with a tag that says "To: Mom (Or grandma, ect.) Love: _________ "
Mother`s Day Blossom
Here is what you`ll need for this project...
 (You will not need the craft felt. Just use the paper. I do not know why I thought I needed craft felt.
Start by taking 3 pieces of tissue paper and stacking them on to of each other. Cut them into fourths like this...
 DO NOT draw the lines like in this picture. This is just an example.
Now you should have 12 quarter sized pieces of tissue paper. Once again, stack them on to of each other. Now we are going to accordion fold it. First fold a small piece at one end.

Now, flip it over and fold it the same length. Keep repeating this until it looks like this...

Next tie a pipe-cleaner around the middle to keep it from popping out.

Look at the side. You can see the separate sheets of tissue paper. Grab one and pull it up until it it fully standing.


Do this with all the sheets until they are alle folded up. Now go to the other side and start again.
 Soon you`ll have a full rose!
I twisted another pipe-cleaner on to the one allready sticking out to make a longer stem.

Now fold a green piece of paper in half...

And fold it in half again.
 Draw on a leaf and cut it out while the paper is still folded.

Now you should have to bow-tie leaf shapes like this:

Lay your stem into on of the folds on the leaf shapes and tape it down.
 Add some tape loops on one side of the leaf shape.


Today I have 2 Mother's Day crafts to make! They are...
The Dandelion Vase...


First we'll start out with the Painted vase.
Painted Dandelion Vase
First of all, I got this vase at the Dollar Store.

Start with a light, light, almost white glass paint and paint a thick white stripe at the top.

Paint the rest of the vase with a sky blue glass paint. Also make sure to blend the sky blue with the whitey blue. (Leave about an inch long gap with no paint for the grass)

Now add the grass. Just paint lots of lines of green paint.

Now for the dandelions. Paint one tiny dot then add lots of lines going out and around it. (Make sure the blue paint is dry enough to touch before doing this part.)

Add some darker yellow to it. Now add a line for the stem, and a leaf.


Ta Da!! You're finished! Tie a ribbon around it with a tag that says "To: Mom (Or grandma, ect.) Love: _________ "
Mother`s Day Blossom
Here is what you`ll need for this project...

Start by taking 3 pieces of tissue paper and stacking them on to of each other. Cut them into fourths like this...

Now you should have 12 quarter sized pieces of tissue paper. Once again, stack them on to of each other. Now we are going to accordion fold it. First fold a small piece at one end.

Now, flip it over and fold it the same length. Keep repeating this until it looks like this...

Next tie a pipe-cleaner around the middle to keep it from popping out.

Look at the side. You can see the separate sheets of tissue paper. Grab one and pull it up until it it fully standing.


Do this with all the sheets until they are alle folded up. Now go to the other side and start again.

I twisted another pipe-cleaner on to the one allready sticking out to make a longer stem.

Now fold a green piece of paper in half...
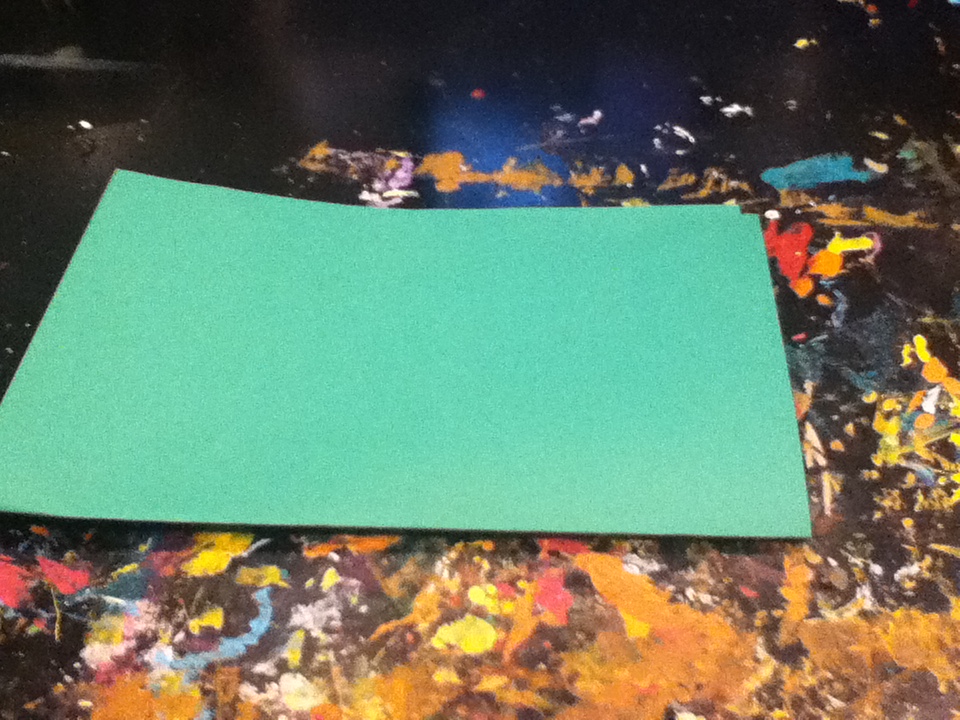
And fold it in half again.


Now you should have to bow-tie leaf shapes like this:

Lay your stem into on of the folds on the leaf shapes and tape it down.


Now fold it over.

Write to: Mom of whoever it`s for than Love and your name on a leaf.

Add the other leaf the same way, but don`t write the to: and Love: on it. Instead, draw some vains on the leaf. You can also put vains on the back of the two leafs.
See you all next post!!
Subscribe to:
Posts (Atom)


Post a Comment