Lucy The Cat

This is my pet cat Lucy. She is a calico tortise shell. Lucy is also 7 years old!
Tuesday, 26 August 2014
Brown Paper Bag Owl Craft
Fire_Cat Here!!
And welcome back to another post. Today we will be making...
This Cutie!!!

This Brown Paperbag Owl craft is easy to make and fun.
Let's get started!!
First, Collect these materials:
-A brown paper bag
-Acrylic paint in at least three different colors of brown
-White, black and yellow acrylic paint
-Masking tape
-News paper / scrap paper
First, push out your paper bag.
 Alrighty, now ball up some newspaper...
 ...And stuff it in. Keep doing so until the bag is full about 3in of room left at the top.
 Now to make the ears. Start by pressing your finger down in the center of one side...
 ...And do it to the other side too. Hold it with a piece of tape. (Masking tape or painters tape works best because you can paint over it.)
 Great! Now we can start painting. Get some dark brown paint and paint on some wing shapes. Fill them in.
 Now let's paint the head. Get a slightly lighter shade of brown and paint on a shape like so:
 Paint all the way around the head, painting the ears too.
Great!! Now, lets paint some feathers on the belly. With a very light shade of brown paint a V shape...
 ...And with a dry brush pull the paint upward.
 Do this a bunch of times so it looks like this:
 Looking good! Now, lets paint the face. Wow, the paint drys fast on this bag. Why don't they make canvases out of this stuff?
Ok, face. Right. Start with some white paint and paint on two white circles to be the white part of the eye.
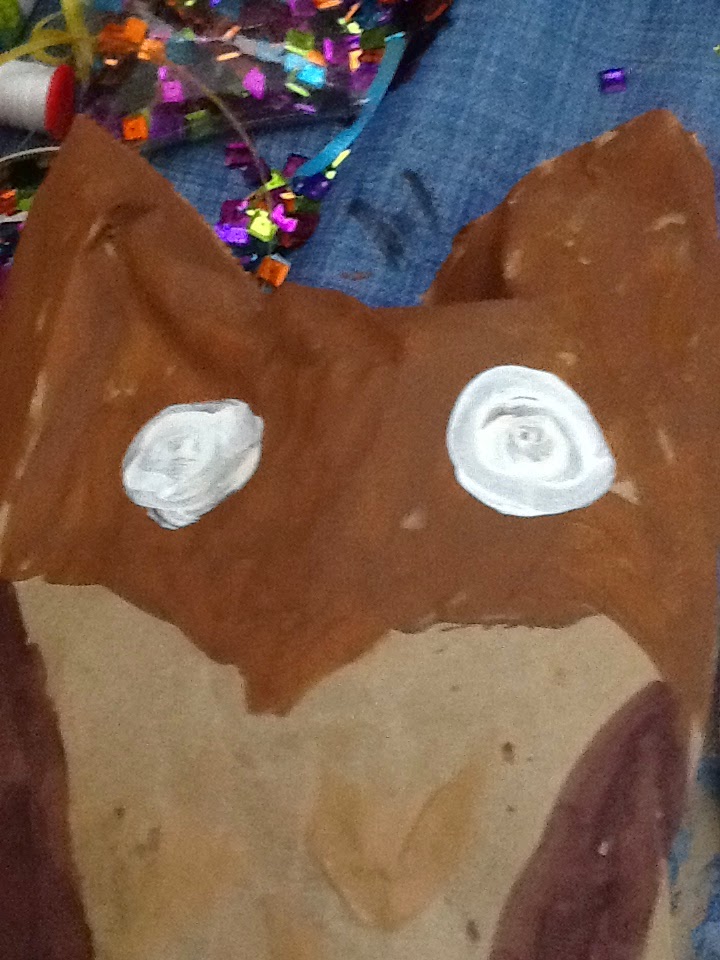 Now get a nice yellow color and paint on a beak at the tip of the face.
 Once the white eyes are semi - dry, you can paint two black dots to be the pupils.
 Yay! It looks so cute! Let dry and place your owl in a place where it can be seen. ;)
Happy fall everyone! I hope you enjoyed this craft!!
See you all next post, bye!
And welcome back to another post. Today we will be making...
This Cutie!!!
This Brown Paperbag Owl craft is easy to make and fun.
Let's get started!!
First, Collect these materials:
-A brown paper bag
-Acrylic paint in at least three different colors of brown
-White, black and yellow acrylic paint
-Masking tape
-News paper / scrap paper
First, push out your paper bag.
Great!! Now, lets paint some feathers on the belly. With a very light shade of brown paint a V shape...
Ok, face. Right. Start with some white paint and paint on two white circles to be the white part of the eye.
See you all next post, bye!
Thursday, 14 August 2014
DIY Personalized Watercolor Bookmarks
Fire_Cat Here!!!
and welcome back to another post. To day we are doing... Drum roll please
{Imagine a drum roll here }
Bookmarks!!!! Yay!!! Reading! Woo hoo!

Ok, enough dilly dally. Lets get started!!
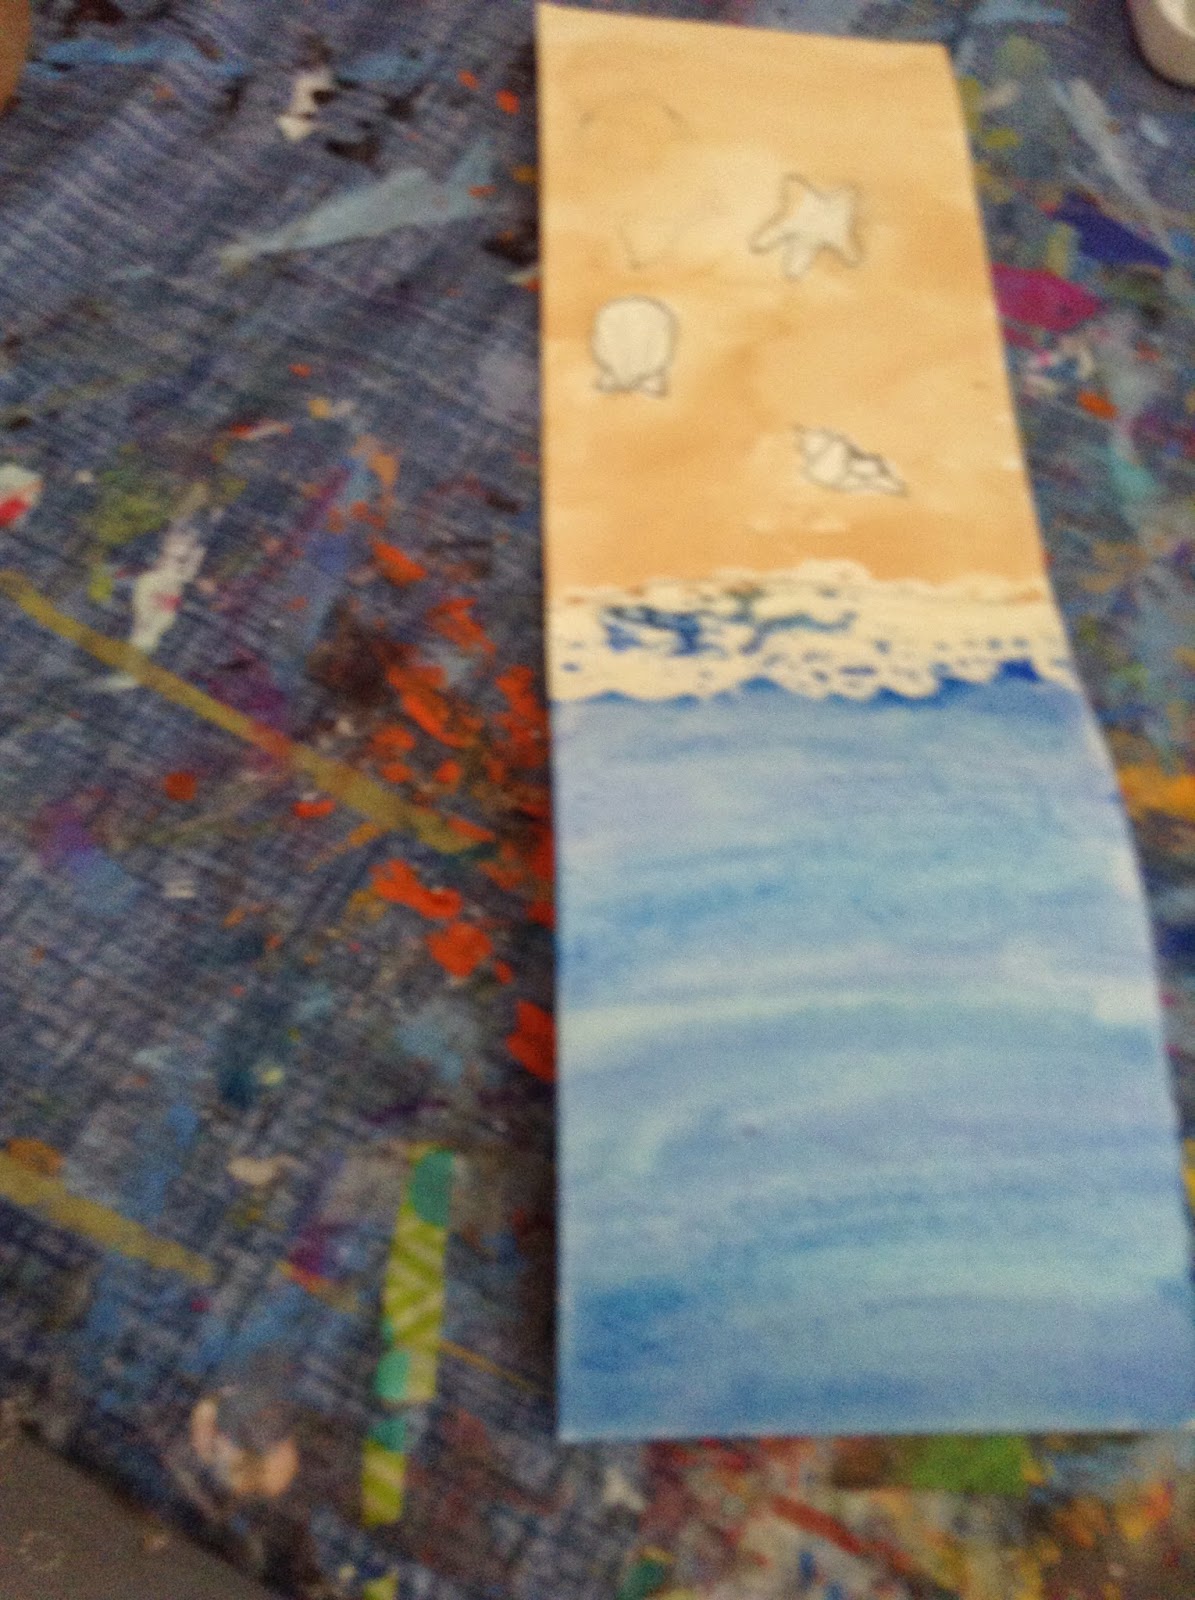
First, cut a strip of watercolor paper and with a pencil, lightly draw out what you want on your bookmark.

After that, break out your watercolor paints and brushes. it's time to paint!
First, I painted on some masking fluid to make some white foam in the water.

next, I mixed some white, yellow, orange and brown to make a sandy color. I just toyed with it a while until I got a color hat I liked.

Now, why don't we paint the water? I put some blue paint on my brush and stroked it from side to side on the paper. From time to time i stroked in some different blues into the water.

 You can see where I put the masking fluid above. /\
Now it's time to paint the first shell. The first thing I did was put some plain water on the shell.
 Then I grabbed some pink...

And dabbed it right a the bottom. The paint spreaded through the water creating this awesomeness:
 Now for the starfish. First, i just painted it a pumpkin orange...


And to finish it off, dab away in the center with a tissue to create a light spot.


And with a tiny bit of tussue dab away in some spots.

Now, let the bookmark dry. While it's drying, we can make the tassle. First, fold a piece of card stock that is about 4in x 6in in half.


Start wrapping some string around it. (Holding the creased side down.)

 Now, pull a string that is about 12in. long. Slide it into the cardstock...
 ...And pull it under the wrapped string.
 Next, pull the strings even and tie a few knots.

 Now, grab both of the strings and hold them close to the knot. Then, pull the knot down to the crease on the paper.
 Now, slide your scissors into the paper and cut!
 Now your tassle is loose. Now, to create the head. Cut another string of the same color that is long enough to tie a knot with. Put it underneath the tassle...
 And tie a double knot.

 Now you should have something looking like this:
 Now, lay the two strings that created the head of the tassle down into the rest and trim them. these strings will become part of the tassle.

 I also like to give all of the strings a trim just to make them even.
Great!! Now we can prepare it to attach to the bookmark.
I'm going to ad beads to mine. This is 100% optional. You can skip these steps and leave out the beads if you'd like.
Ok, if you want an easier time sliding on your beads, tightly wrap a piece of tape at the ends of both strings to create a stiff end to slide the beads on easily.
 Now, slide on some beads. (Pony beads are the best, but wodden beads work just as good.

 When you are putting on your beads NEVER cover the whole string. You'll see in a moment why.
Now, pull of the tape and tie a not. Then you can trim your string. I made the mistake of cutting the string before I tied the knot, and I ended up making the string to short. I couldn't tie the knot, so I just put a piece of tape at the end.
Great! Now lets get back to the bookmark. Now that it's dry, you can trim it and shape it. Before i did any trimming, I covered my bookmark with paking tape. This gives it a look that looks like it was laminated.
 ( If you are available to a laminating machine, just go ahead and use that.)
Now, grab a scrapbooking corner punch and round the edges. If you don't have one of theese, just cut it.


After that, cut a hole in the corner with a hole punch.
 Now follow these photos for how to attach the tassle.


 Viola! You;'re done. I hope you like it!
 See you next post!!
~Fire_Cat2000
and welcome back to another post. To day we are doing... Drum roll please
{Imagine a drum roll here }
Bookmarks!!!! Yay!!! Reading! Woo hoo!
Ok, enough dilly dally. Lets get started!!
First, cut a strip of watercolor paper and with a pencil, lightly draw out what you want on your bookmark.
After that, break out your watercolor paints and brushes. it's time to paint!
First, I painted on some masking fluid to make some white foam in the water.
next, I mixed some white, yellow, orange and brown to make a sandy color. I just toyed with it a while until I got a color hat I liked.
Now, why don't we paint the water? I put some blue paint on my brush and stroked it from side to side on the paper. From time to time i stroked in some different blues into the water.
Now it's time to paint the first shell. The first thing I did was put some plain water on the shell.
And dabbed it right a the bottom. The paint spreaded through the water creating this awesomeness:
Now, dap some yellow in the middle...
And to finish it off, dab away in the center with a tissue to create a light spot.
And last but not least, paint the last shell blue...
Now, let the bookmark dry. While it's drying, we can make the tassle. First, fold a piece of card stock that is about 4in x 6in in half.
Start wrapping some string around it. (Holding the creased side down.)
Great!! Now we can prepare it to attach to the bookmark.
I'm going to ad beads to mine. This is 100% optional. You can skip these steps and leave out the beads if you'd like.
Ok, if you want an easier time sliding on your beads, tightly wrap a piece of tape at the ends of both strings to create a stiff end to slide the beads on easily.
Now, pull of the tape and tie a not. Then you can trim your string. I made the mistake of cutting the string before I tied the knot, and I ended up making the string to short. I couldn't tie the knot, so I just put a piece of tape at the end.
Great! Now lets get back to the bookmark. Now that it's dry, you can trim it and shape it. Before i did any trimming, I covered my bookmark with paking tape. This gives it a look that looks like it was laminated.
Now, grab a scrapbooking corner punch and round the edges. If you don't have one of theese, just cut it.
After that, cut a hole in the corner with a hole punch.
~Fire_Cat2000
Subscribe to:
Comments (Atom)

Post a Comment